
Everything below is simply lifted from their website (with minor tweaks) (Tech Perplexed / techperplexed.ga). We will not provide support for this.
Finished Part 2 - Configuring Ubuntu? Then you can proceed with the installation of Plex itself. Thanks to an awesome script that is available for free, this is going to be a breeze. We now need to restart PuTTY in localhost mode to set up the Plex server using our local browser.
Open a new terminal window, select your saved Plex session and click "Load".
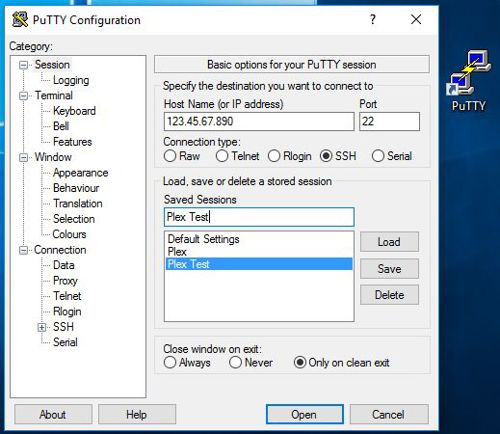
Don't click "Open" yet, first, look for Connection in the menu on the left hand side, open up SSH and click "Tunnels".
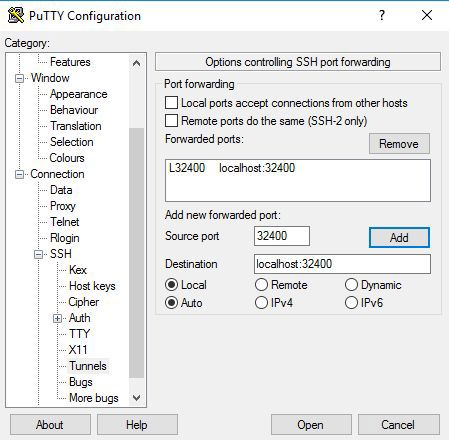
In the field behind Source port type: 32400
In the field behind Destination type: localhost:32400
Click "Add".
Now click "Open".
You can now login as your newly created plexuser.
Installing Plex
To install Plex, type (copy/paste):
bash -c "$(wget -qO - https://raw.githubusercontent.com/mrworf/plexupdate/master/extras/installer.sh)"
All in one line (you may need to scroll horizontally). If you are asked to enter your password, then this is not your Plex password, but the password you chose for plexuser in Linux.
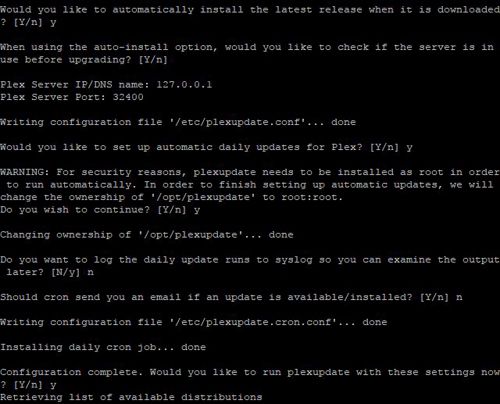
Type the letter y to proceed with the installation, then hit Enter to agree to the default location "/opt/plexupdate".
You will be asked if you want to install the latest PlexPass releases. Important: answer y ONLY if you own a PlexPass, otherwise type n. I have a PlexPass, so I entered y.
If you choose y you will need to provide your Plex credentials. Enter your Plex e-mail address and Plex password.
Follow the rest of the prompts. I chose y when asked if I want to install the latest updates whenever they are released and y to check if the server is in use before upgrading,
Hit the Enter key twice when presented with the DNS/IP name and server port, 127.0.0.1 and 32400 are both correct.
I chose y to set up automatic daily updates for Plex.
Choose y that you wish to continue.
I chose n that I do not wish to run syslog, and n that I don't want to receive an email if an update is available.
Lastly, make sure you choose y that you want to run the Plex update right now.
Congratulations, Plex is installed!
If you ever need to make chances to this configuration, type
/opt/plexupdate/extras/installer.sh
This will run all options again and update the configuration with your new choices. Don't click away PuTTY, we're not done yet.
Getting Plex to run
Leave the terminal open on your desktop and open your local computer browser.
Visit this link:
http://127.0.0.1:32400/web
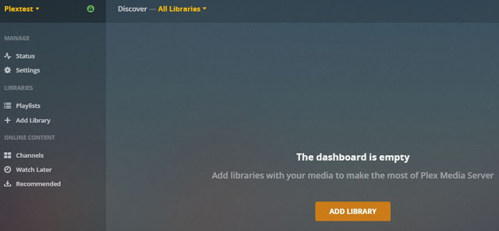
If all goes well, you will be presented with a Plex login screen. You're doing fantastic!
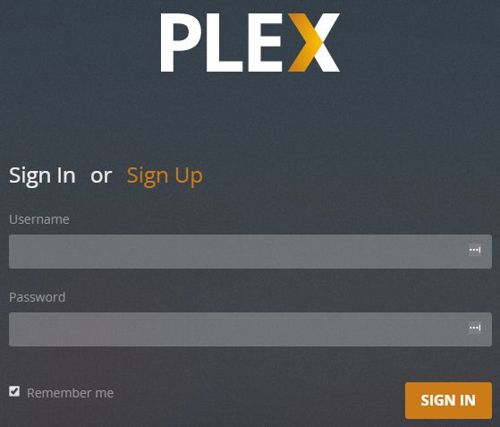
Sign in with your Plex credentials, or create a new account if you are new to Plex. Continue clicking "Next" until you get the Plex main page.
Later we'll finish setting up the server, but before we proceed there is one more thing to do. Make sure your Plex server is available at https://app.plex.tv. If it is, click the Settings button (top right), click "Server", then "Remote Access".
Make sure you see "Fully accessible outside your network" in green.

Perfect, Plex is installed properly and we're ready for Part 4 - Setting up Rclone and/or Plexdrive.
Comments
Recent Posts


Categories
