
Everything below is simply lifted from their website (with minor tweaks) (Tech Perplexed / techperplexed.ga). We will not provide support for this.
You have completed all the steps in Part 1 - Creating an infinite Plex server using a VPS and a cloud service. We're now ready to configure Ubuntu so that it will work with Plex and your mounted Google drive.
Change root password
The root password you were provided with is probably not all that strong, and for an added layer of security you should change it. I suggest you use a password generator to create a really long 20 character super difficult password. Make sure it's stored somewhere safe. You will not need during the installation of Plex, but you may need it again in the future.
Here's mine: 5ehMN&7cQY*#yJZnAaNp. Notice it is 20 characters long, completely random, contains capital letters, small letters, numbers and symbols. Now that is a strong password!
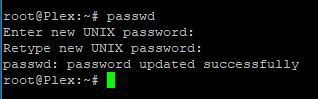
You are still logged in as root on PuTTY. In the terminal, type:
passwd
Then paste (right click) your generated password, hit Enter, and paste it a second time.
If all goes well, it will tell you that your password was updated successfully.
Again, make sure your new password is stored in a safe place!
Installing updates and some vital packages
Next, we'll perform a few necessary updates and installations. You can type these commands manually, or if you're lazy like me, just copy and paste them from the browser here (Ctrl-C) into the PuTTY terminal (right click).
First, let's update Ubuntu with all the latest patches and updates. Type (or copy/paste):
sudo apt-get update && sudo apt-get upgrade
Sit back and relax while Linux flashes by lots of yakkety yak until it pauses and asks if you accept the additional disk space used. Type y and Enter.
After much more gobbledygook it'll probably pause on a blue screen. Ignore the warning by hitting Enter.
This time it'll probably finish and you'll see the green prompt again. If at some point in the future you get the message that there are packages that can be updated, run
sudo apt full-upgrade
We shall now install Fail2ban to prevent hackers from trying to get into your system. Enter
sudo apt-get install fail2ban
Agree to the installation (y, Enter). If the above command isn't displayed in one single line (depending on your browser settings), make sure you copy everything. Each time you see a text box containing a > this will mean you'll need to enter the entire code in PuTTY.
Go have a cup of coffee, talk a bit to a friend and come back after one hour. Then type
sudo cat /var/log/fail2ban.log
This will tell you the amount of hackers that tried to get into your system... yes... I was shocked too. At least we're protected now against brute force attacks.
Now we're going to install some packages that you need later. First we need the "GNU nano" text editor:
sudo apt-get install nano
Some newer versions of Linux don't include unzip or curl out of the box, let's install those just in case:
sudo apt-get install unzip
Follow the prompts, depending on whether it was installed already or not. Curl is needed for some scripts:
sudo apt install curl
We also need to install FUSE, the package you asked your provider to enable.
sudo apt-get install fuse
Type y to continue. If at this point you get an error, you may need to contact your provider to enable FUSE, and wait for them to get back to you that it's done. You can't complete your installation until they have enabled it.
Depending on where your VPS server is, the time might be different from your local timezone. This would throw off your planned server maintenance / Plex downtime and other cron jobs. There is an easy fix for that:
sudo dpkg-reconfigure tzdata
Then select the area and time zone where you live.
Getting the firewall ready for Plex
We want Plex to be able to talk to the world, and you to be able to talk to your VPS. All other communications (hacker attempts!) are unwelcome. For added security, we will enable the firewall and create an exception for Plex. Type (or copy/paste) the following lines:
sudo apt-get install ufw
sudo ufw default deny incoming
sudo ufw default allow outgoing
sudo ufw allow ssh
sudo ufw allow 32400
Your firewall is now ready for Plex.
You can add other exceptions as needed. For example, if you plan to install trakt.tv later, you will need to add this line:
sudo ufw allow 33400
It's always best practise to only open the ports you will actually need. Then enable the firewall:
sudo ufw enable
Then type y to confirm the command.
Create another Linux user
Linux is very security minded, and you should perform most tasks under a separate user, not root. It is an added layer of security and also makes things easier in the long run when you need to perform maintenance. Think of a username you want to use - your own name would be great. Do not choose "plex", that name is reserved to be used by Plex itself. Other than that, you can use your imagination.
Type
adduser plexuser
Note: make sure you substitute plexuser to your own username wherever it occurs in the tutorial... I might not remember to remind you :)
Use a strong password that you'll remember easily (this is the password you'll be needing each time you log in or make changes), but hard to crack. I chose 123456 - just kidding!
You can enter through all the fields leaving them empty if you like, and finish by typing y and Enter.
Give your new user the right permissions to install and maintain Plex:
usermod -aG sudo plexuser
In order to prepare your server for Plex, you will need to give that name some permissions for later installations. Go ahead and enter
sudo visudo
A text file will open. Use the arrow keys on your keyboard to scroll to the bottom and add on a new line:
plexuser ALL=(ALL) NOPASSWD:ALL
It will look like this:
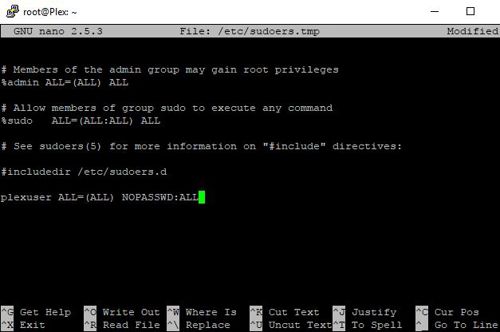
Save this file by hitting Ctrl-O, then Enter. Exit the editor by hitting Ctrl-X.
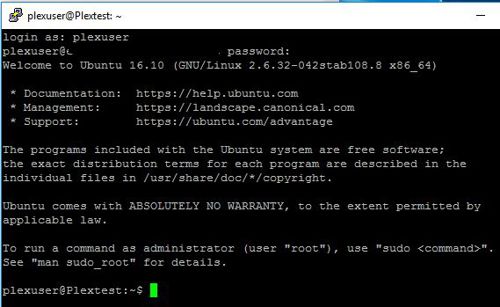
Exit the terminal now (just close the PuTTY window) and log back in with your brand new username and password. Make sure you see your newly created user before the green prompt, instead of "root".
We're ready for Part 3 - install and configure Plex!
Comments
Recent Posts


Categories
